
A container office is a quick-to-install, portable solution for construction sites, storage yards and temporary workspaces. But turning a container into an office you can actually work in takes more than cutting a window and painting it. Below we walk through the steps using the work items of a real site office project we completed in the modifiTAINER workshop.
1. Requirements and layout
The first question is "how many people, for how long, and where?". Will the office be permanent, or moved from site to site? Where will the electricity and water connections come from? Is the ground level and firm? These answers determine the container length (20 ft / 40 ft), the ceiling height (standard / high cube) and the interior fit-out.
2. Choosing the container
For an office, a container with no structural damage and a wind & watertight (WWT) grade or better is usually chosen. Chemical residue and odour in the floor should also be checked separately for a workspace (see the buying checklist).
3. Cutting and steel framing
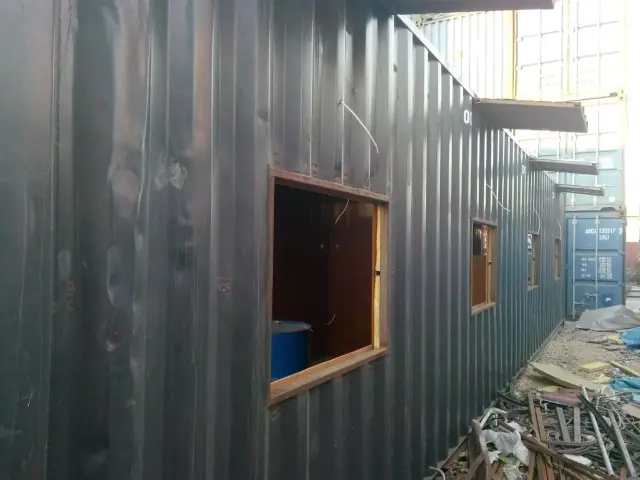
The container’s corrugated walls are part of its load-bearing structure. Every opening cut for a window or door weakens the structure. That is why the edges of the openings are reinforced again with a steel frame. In the site office project, the window and door openings were framed in this way.
4. Insulation
A steel box heats up in summer and gets cold in winter. The real problem, though, is condensation: the temperature difference between inside and outside forms water droplets on the steel surface. Insulation determines both comfort and the lifespan of the interior lining. If this step is skipped, the office becomes unusable.
5. Electrical installation
Cabling for lighting, sockets, climate control and network connection is done before the interior lining. Adding cables after the lining is closed is both expensive and messy. A main incomer and distribution board are planned according to the connection point at the site of use.
6. Interior lining and flooring
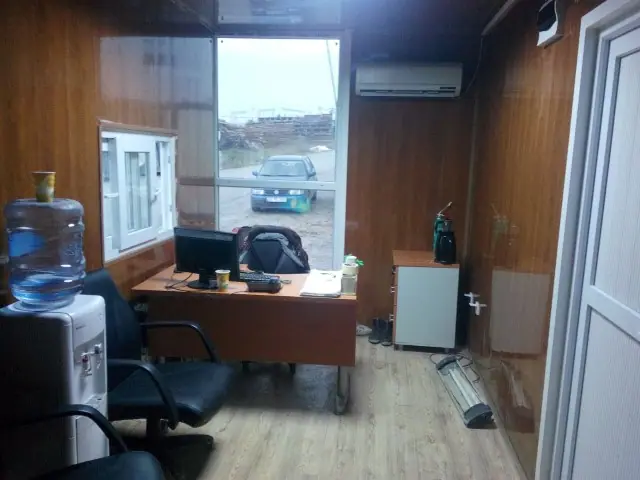
Wall and ceiling lining is installed over the insulation. The floor is laid over the container’s plywood floor with a covering suited to its intended use. In the site office, the interior lining and flooring were completed at this stage.
7. Paint, delivery and installation
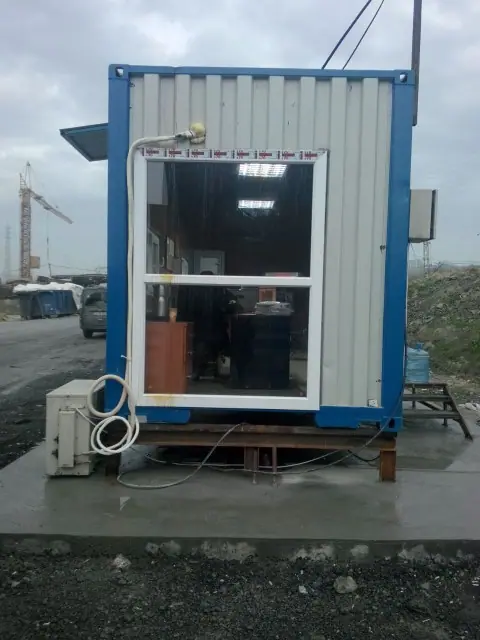
Exterior paint provides both appearance and corrosion protection. Delivery is by truck and crane. Level ground where the container is placed is essential for the doors and windows to work without problems for years.
Work items in this project
- Steel framing
- Insulation
- Cabling
- Interior lining
- Flooring
Project details and photos are on our projects page. For your own office project, take a look at our modification service or tell us about your project. We respond to quote requests within 12 hours.